Editing row, Saving row and Removing rows Dynamically in Lightning component Salesforce

Hey guys, In this post we are going to learn about that how to edit row, saving row or removing row dynamically in Salesforce lightning component.
In this example we will customize the same component and achieve to the editing row, saving row and removing rows functionality of dynamically on Custom sObject by help of wrapper apex class and JavaScript Controller in lightning component.
We do not allow to Delete or Edit multiple rows at a same time. First you will need to cancel of the current rows than after you will be able to delete or edit of another rows.
Files we used in this post example:-
wrapperClassCustomObjCmp.cmp
Lightning Component
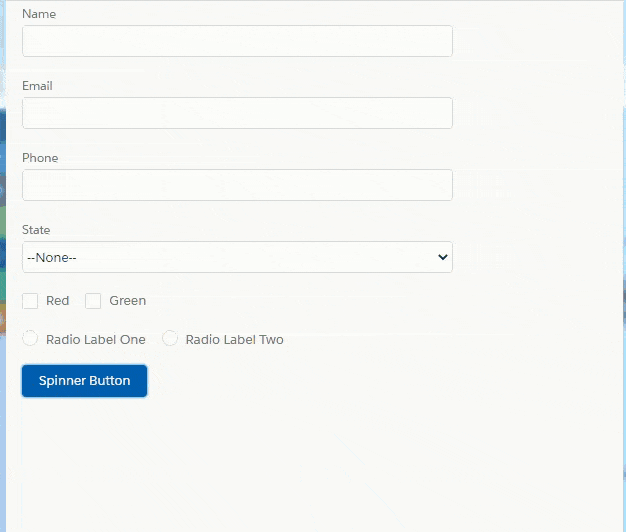
It is used for display the Input filed of Name, Address, Email, and Button Icon of Edit, Delete, Cancel and Save on the Table.
wrapperClassCustomObjCmpConroller.js
JavaScript Controller File
It is used for Edit, Save, Cancel and Delete functionality and this function communicate to server side apex method.
wrapperClassCustomObjCmpHelper.js
JavaScript Helper File
It is used for refresh the page after delete or Save the record.
wrapperCustomObjCtrCmp.apxc
Apex Class Controller
It is used for delete and save record from database server
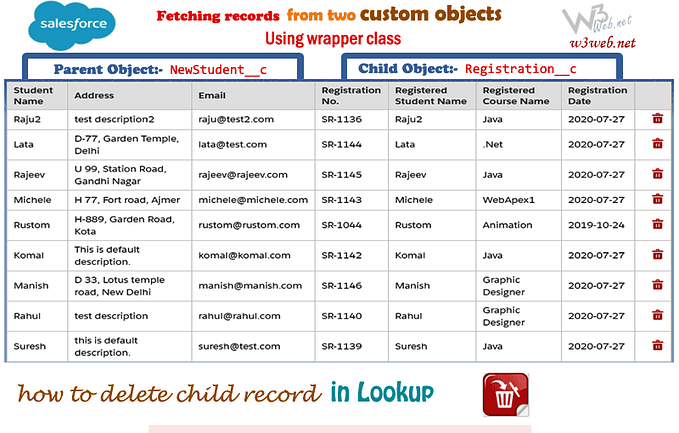
Custom Object and their fields
Custom object like database and custom fields are columns of data table. We customized the record of both fields by using the apex class method.
Final Output

Other related post that would you like to learn
Note:- Custom sObject >> NewStudent__c
You need to change custom sObject name and there fields name with your custom sObject.
Step 1:- Create Lightning Component : wrapperClassCustomObjCmp.cmp
From Developer Console >> File >> New >> Lightning Component
wrapperClassCustomObjCmp.cmp [Lightning Component File]
Step 2:- Create Lightning Component : wrapperClassCustomObjCmpConroller.js
From Developer Console >> File >> New >> Lightning Component >> JavaScript Controller
wrapperClassCustomObjCmpConroller.js [JavaScript Controller]
Step 3:- Create Lightning Component : wrapperClassCustomObjCmpHelper.js
From Developer Console >> File >> New >> Lightning Component >> JavaScript Helper
wrapperClassCustomObjCmpHelper.js [JavaScript Helper File]
Step 4:- Create Lightning Component : wrapperClassCustomObjCmp.css
From Developer Console >> File >> New >> Lightning Component >> Component Style CSS
wrapperClassCustomObjCmp.css [Lightning Component File]
Note:-Static resource zip file
You need to change $Resource.SLDS2016 with your SLDS zip file name (static resource zip file Name)
Step 5:- Create Lightning Application : wrapperCustomObjCtrCmp.apxc
From Developer Console >> File >> New >> Apex Class
wrapperCustomObjCtrCmp.apxc [Apex Class Controller]
Related further post that you want to learn
Originally published at https://www.w3web.net on July 27, 2020.